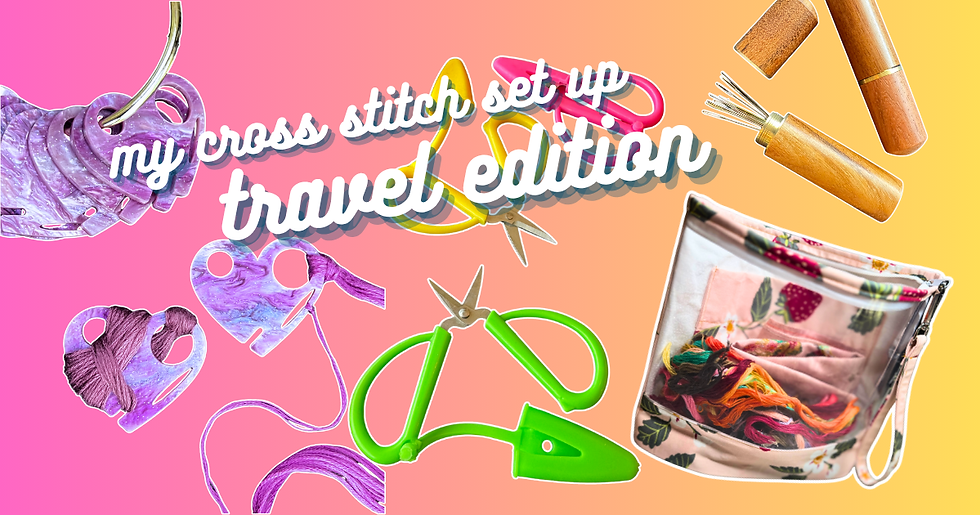
My Cross Stitch Setup - Travel Edition
- Jacquie

- Aug 5, 2025
- 4 min read
Some of the links included here are affiliate links. This means that, at zero cost to you, I may earn an affiliate commission if you click through the link and finalize a purchase.
Over the years of sharing cross stitching content online, one topic that always performs surprisingly well is my travel stitching setup. Yes, I do stitch on planes — and no, TSA has never stopped me for my needles or scissors. (Though I was once forced to toss my crochet hooks at security, and I’m still a little salty about it.)
Of course, everyone’s ideal travel setup will vary depending on habits and preferences, but here are all of my tried-and-true favorites.
My Favorites
Heres a quick link list to the items mentioned in my online videos. Keep reading for a detailed breakdown of each item. You can also check out my amazon storefront for more product recommendations.
Project Bags
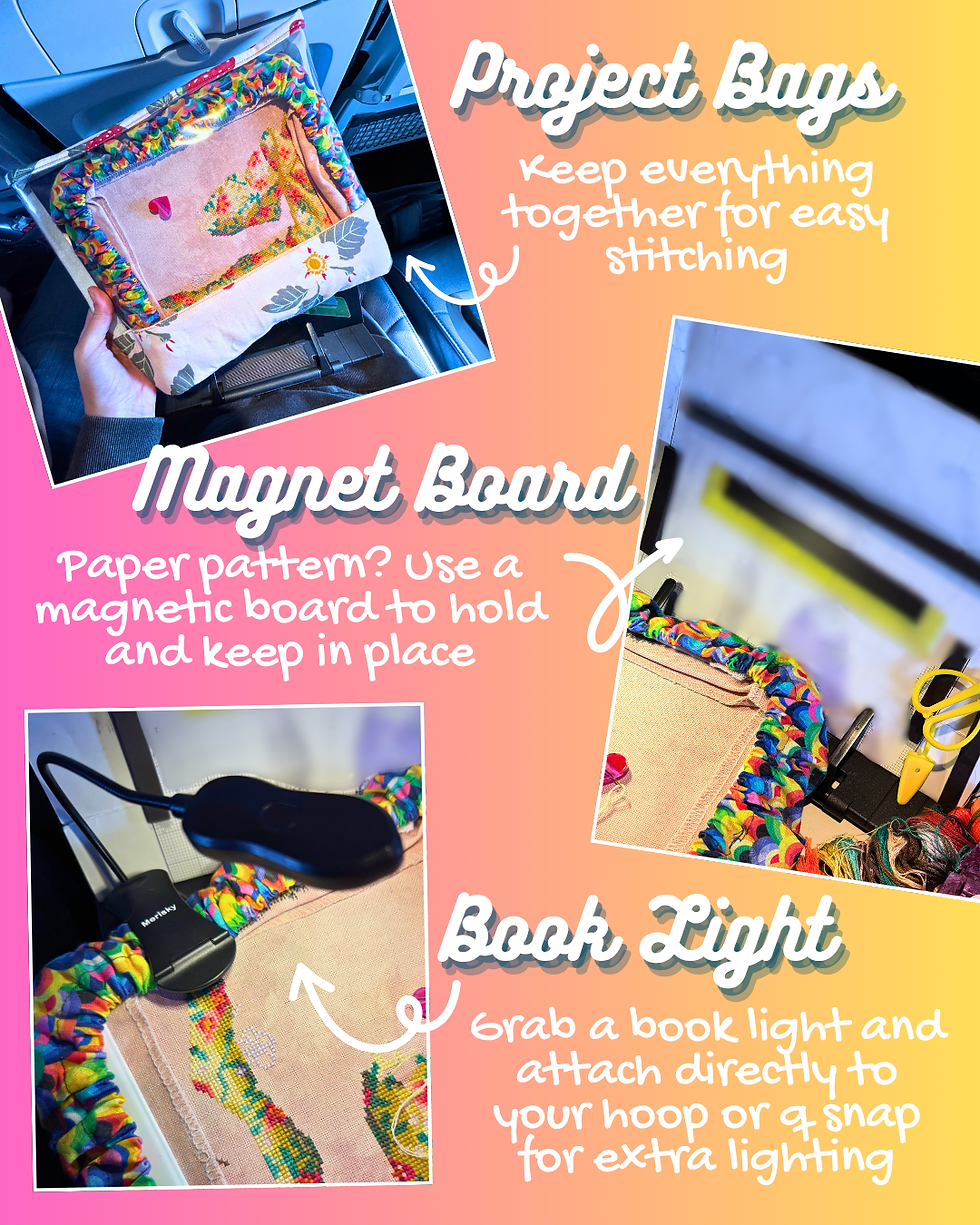
There’s no doubt that a project bag is essential for stitching on the go. It keeps everything accessible and organized in one spot, making sure everything stays within easy reach. I
particularly love this bag pattern which features a clear-view pouch so you can easily see what’s inside, and a gusseted bottom that allows the bag to stand upright (perfect for preventing spills!).
Not up for sewing your own bags? You can find basic zippered pouches online in a variety of sizes.
Magnet Board
While I strongly prefer using PDF cross stitch patterns on my tablet, sometimes I’m stuck with a paper version. In those cases, I’ve found that a magnetic board is the best way to keep the pattern propped up and positioned where I need it. The magnetic strips hold the pattern in place and can also be lined up with the row you’re stitching to help keep your spot.
Book Light
One of my favorite travel tips is picking up a small, rechargeable reading light. Good lighting is so important for preventing eye strain (and avoiding mistakes), and whether you’re stitching on a plane or in a hotel room, there’s almost never enough of it. I love this one as it’s super portable thanks to its compact size and it clamps directly onto my frame.
Floss Drops
If you’re familiar with my content, it should come as no surprise that I consider floss drops
the superior method for organizing floss, especially when it comes to kitting up your projects! The ease of labeling, pulling a single strand, and having a spot for leftover floss bits makes them the most practical choice for travel.
I keep all of my project threads clearly labeled on drops, then group them together on a storage ring. It’s perfect for tossing into a project bag and pulling everything out at once when I need it. Labeling the drops with the project symbols makes stitching even easier, no need to reference the symbol key every time I switch colors!
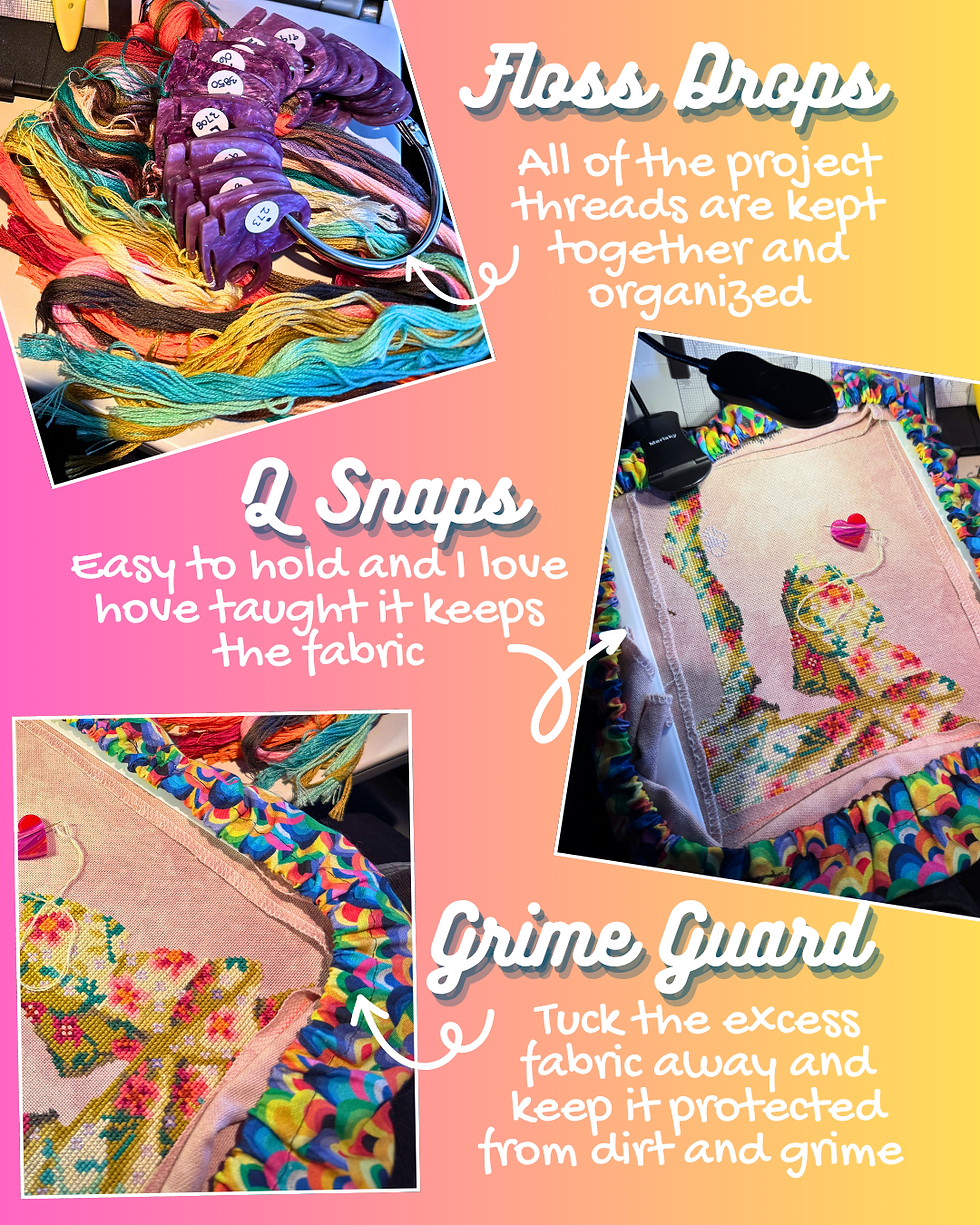
Q-Snaps
Unless you’re stitching in hand, you’ll want a travel-friendly hoop or frame. My favorite is Q-Snaps; they hold your fabric snug and super taut without leaving deep creases or hoop marks. The fabric is clamped between the frame and snap-on covers, creating even tension across your stitching area without the constant readjusting that traditional hoops often require. They come in a variety of sizes, and you can even mix and match the pieces to build whatever frame size you need - perfect for creating a smaller setup for travel.
Grime Guards
To manage excess fabric around the edges of your hoop or Q-Snap and keep everything clean (especially important on a plane), I love using grime guards. They’re stretchy fabric sleeves that fit around your frame, keeping your fabric clean while also containing bulk. I’ve DIY’d my own using YouTube tutorials, but you can also find custom-made grime guards on Etsy. Elastic magnetic holders or fabric huggers can also be used to tuck away extra fabric around your frame, but I especially love the added bonus of protecting your fabric that grime guards provide.
Scissors
Yes, on U.S. domestic flights you can travel with scissors! As of this post, TSA allows travelers to carry small scissors with blades shorter than 4 inches. I bring along an even smaller pair just to avoid any extra security checks, and there are tons of mini snips out there to choose from. I especially like finding a pair that folds up or comes with a travel sheath to make sure
nothing gets poked or accidentally snipped while it’s in my bag.
Needle Holder
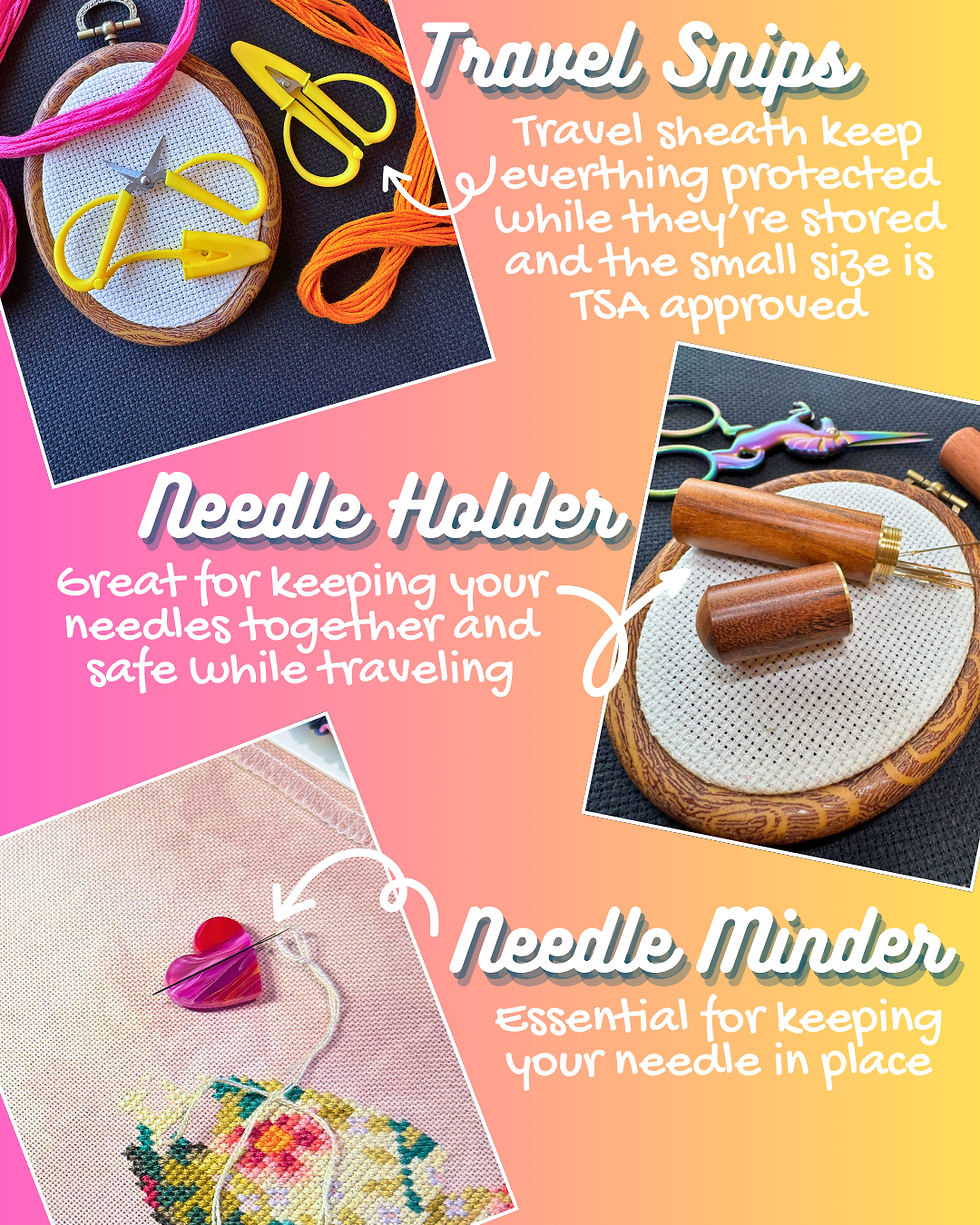
You won’t get much stitching done if you don’t have a needle with you. And yes, just like scissors, TSA allows sewing needles in your carry-on. I like to pop a few into a needle case to make sure nothing goes missing (ouch). Bonus points for using something cute, like a wooden holder or a small magnetic tin.
Needle Minder
I find needle minders essential for my everyday stitching at home, and especially useful when traveling. Space is often limited, and you definitely don’t want to lose a needle in public (or private, for that matter). The magnetic backs hold your needles securely in place and attach to your fabric without causing any damage.
Final Thoughts
I love to cross stitch while traveling, it’s genuinely one of my favorite ways to make use of a few hours on a plane, and honestly, a vacation wouldn’t feel complete without a little stitching time. For more of my go-to tools and recommendations, check out my Amazon storefront. And if you’re still a little nervous about packing scissors or needles, be sure to review TSA guidelines before your trip - and don’t forget to check local and international rules if you’re flying abroad.
Let me know in the comments if you like to travel with your embroidery and what your favorite travel tips are!

Comments